Recording the Web Express Logon macro
Take the following steps to record the logon automation macro:
- In an open session, click the Record Macro button on the toolbar.
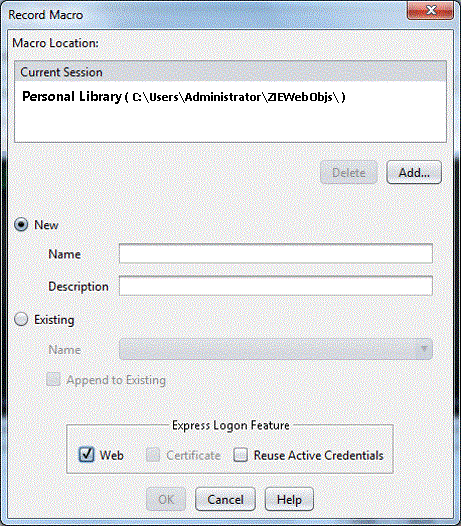
On the Record Macro window (Figure 1), under
Express Logon Feature, select Web.
Figure 1. Record macro window
- Enter the application ID (3270 sessions only) in the Application
ID window (Figure 2) and then click OK. This
name must match the RACF PTKTDATA (Passticket Data Profile) application
name that is configured on the z/OS host. This name could be the same
as the application name that the user is logging on to (for example,
the name on USSMSG10). When creating PTKTDATA profiles for applications
such as TSO (time sharing option), the application name portion of
the profile will most likely not be the same. For example, RACF requires
that the application ID portion of the profile name be TSO+SID. Refer
to the Security Server (RACF) Security Administrator's
Guide, publication number SC28-1915, to determine the correct
profile naming. You can obtain this ID from the host administrator.
Figure 2. Application ID

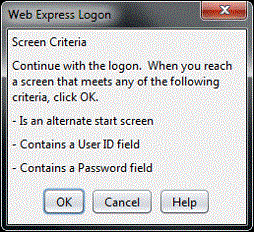
- The Screen Criteria window (Figure 3)
shows you what is needed by the macro to complete the logon. Once
you reach a screen that meets any of the criteria, click OK..
Figure 3. Screen Criteria
- On the Alternate Start Screen window (Figure 4), specify whether this screen is an alternate
start screen and then click Next. The macro can start playing when
a start screen is recognized or when an alternate screen is recognized.
You can have only one alternate start screen per logon. If you have
multiple logons, you will pass through this screen again.
The alternate start screen is a screen from which the user might want to play the macro to log on to the application. If the application has more than one possible start screen, you should identify it during the recording process so that the macro can be played from that screen. For example, the logon process might begin from the USSMSG10 screen or the application logon screen. You may start the logon macro from either the start screen or the alternate start screen. You can designate only one screen as an alternate start screen. There is no alternate start screen after the screen that contains the user ID.Figure 4. Alternate Start Screen

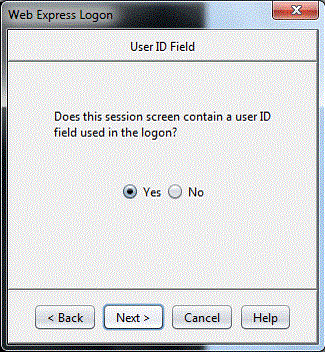
- On the User ID Field window (Figure 5),
select Yes to specify that the session screen contains a user ID field.
Click Next.
Figure 5. User ID Field
- On the User ID Field Location window (Figure 6), type the user ID in the User ID field,
not on the session screen. You must enter a user ID to continue recording
the macro. The macro enters the actual user ID text in the user ID
field on the session screen. Row/column determines the cursor position
on the screen for the user ID field. Click Current to use the cursor's
current position on the session screen if you know it is correct.
If the current cursor position is not correct, move the cursor to
the beginning of the user ID field on the session screen to identify
where the user will enter the user ID and click Current. The field
values change to match the new cursor position on the screen. If
the initial cursor position is correct, then there is no need to move
the cursor on the session screen. When you are finished, click Next.

Click Current only if you will not be using this screen for multiple applications and the location of the user ID field never changes. Figure 6. User ID Field Location
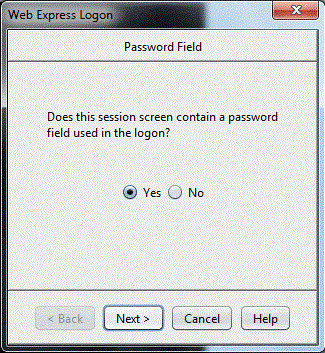
- On the Password Field window (Figure 7),
select Yes to specify that the session screen contains a password
field. Click Next.
Figure 7. Password Field
- On the Password Field Location window (Figure 8), type the password in the Password field
on this window, not on the screen. You must enter a password to continue
recording the macro. The macro enters the actual password text in
the password field on the session screen. Row/Column determines the
cursor position on the screen for the password field. Click Current
to use the cursor's current position on the session screen if it is
correct. If not, move the cursor to the beginning of the Password
field on the session screen to specify where the user will enter the
password and click Current. The field values change to match the new
cursor position on the screen. If the initial cursor position is correct,
then there is no need to move the cursor on the session screen. When
you are finished, click Next.

Click Current only if you will not be using this screen for multiple applications and the location of the password field never changes. Figure 8. Password Field Location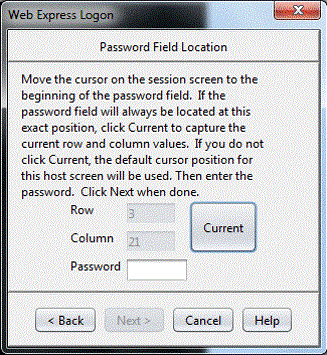
- On the Multiple Logons window (Figure 9),
click either Yes or No.
Figure 9. Multiple LogonsClick Yes if you want to define another logon sequence for an additional application. If you click Yes, you will advance to the Continue window (Figure 10). Once you reach a point in the macro that requires another User ID and password logon, click Next.
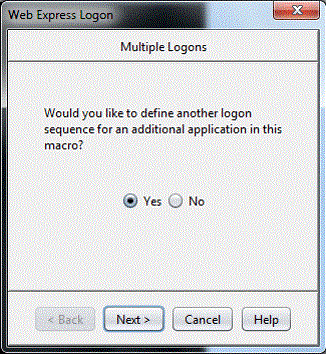 Figure 10. ContinueClick No to finish recording the logon portion of the macro (see Figure 11). Click OK to finish.
 Figure 11. Finish
- Finish recording your macro using the Macro Manager, and click Stop on the toolbar.
- If you are planning to save the macro to your current session (and not to a file), another window appears that asks you if you would like the macro to start automatically when the user opens the session. Click Yes if you would like the macro to auto-start. If you select No, the user will have to start the macro manually.