Step 3: Begin creating your HTML file.
The Z and I Emulator for Web Deployment Wizard allows you to create an HTML file that is used to launch Z and I Emulator for Web sessions. Within the Deployment Wizard, you can add, delete, configure, and start sessions. It guides you configuration choices and provides comprehensive help for the features. When you have finished selecting features, it creates the HTML and supporting files for you.
To begin creating your HTML file on a Windows machine, take the
following steps:
- Open the Deployment Wizard:
- If you automatically installed the Deployment Wizard as part of the Windows Z and I Emulator for Web server, click Start > Programs > HCL Z and I Emulator for Web > Administration > Deployment Wizard.
- If you installed the Deployment Wizard from the Z and I Emulator for Web DVD separately, click Start > Programs > HCL Z and I Emulator for Web Deployment Wizard > Deployment Wizard.
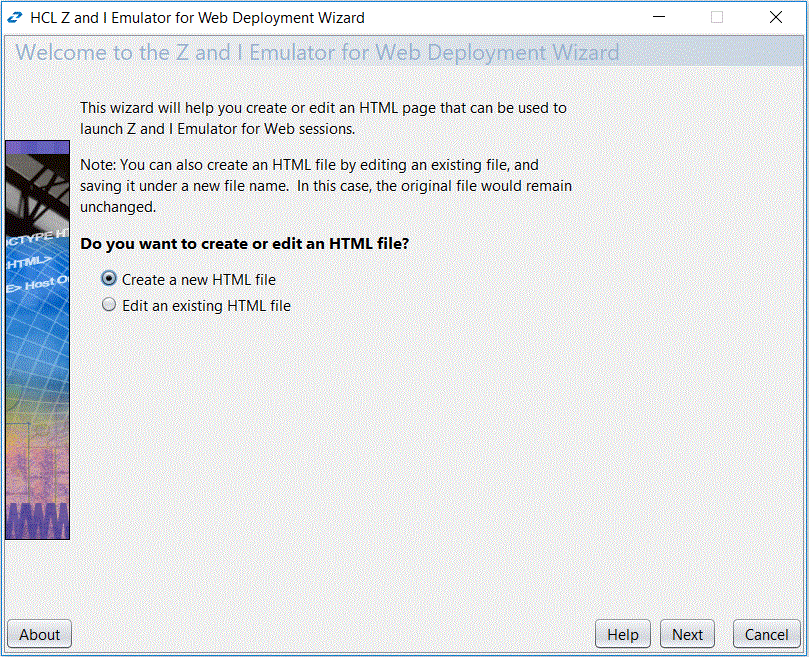
- On the Welcome to the Deployment Wizard window (Figure 1), select either to create a new
HTML file or edit an existing file. Click Next.
Figure 1. Welcome to the Z and I Emulator for Web Deployment Wizard window
- If you are creating a new HTML file, select one of the following
three configuration models on the Configuration Model window (Figure 2) and click Next:
- HTML-based model
- Configuration server-based model
- Combined model

If you are using the HTML-based or Combined models, you can create your HTML file as normal. However, if you are using the Configuration server-based model, you must configure the HTML file with additional steps. Refer to Web Express Logon using the Configuration server-based model for more information. Figure 2. Configuration Model window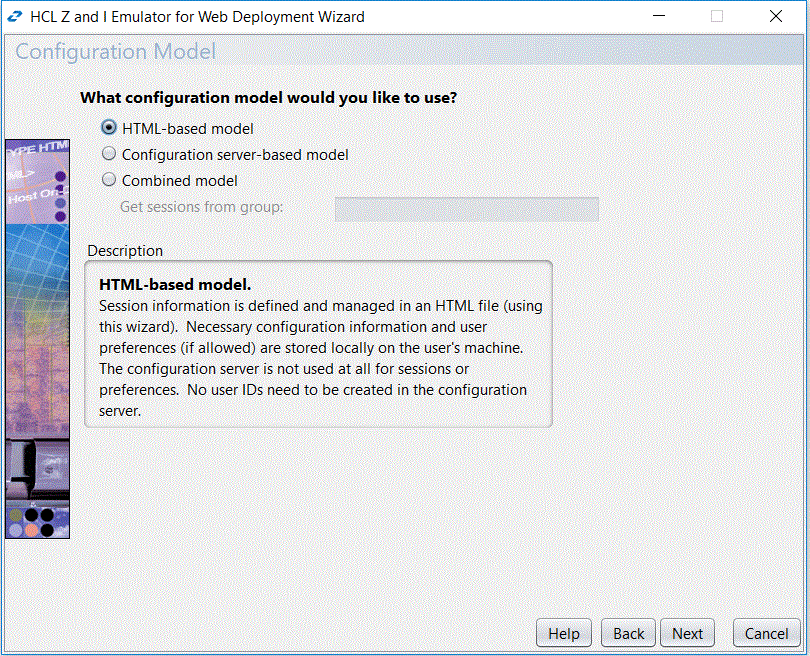
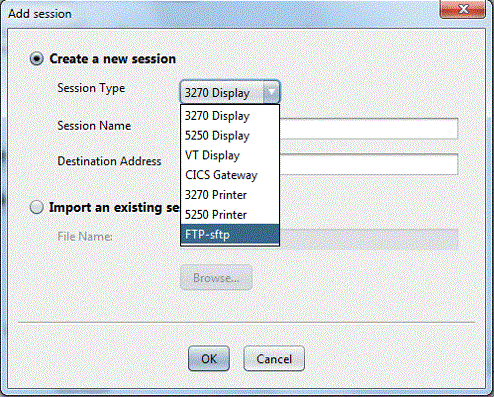
- On the Host Sessions window, click New/Import to open the Add
session window (Figure 3). This window allows you
to either create a new session (default) or import an existing session.
To create a new session, select FTP as the host type, enter a session
name, and a destination address. Click OK to return to the Host Sessions
window.
Figure 3. Add session window