Step 6: Configure the Z and I Emulator for Web session to use Web Express Logon.
Take the following steps to configure your Z and I Emulator for Web session to use Web Express Logon.
- Using the Host Sessions window, highlight your session and select
Properties under the Configure drop-down menu. On the left side of
the window, select Express Logon under Connection.

You may also open session properties by right-clicking a session icon and selecting Properties. - On the Express Logon window (see Figure 1),
select Web Express Logon as the Express Logon type.
Figure 1. 3270 Express Logon
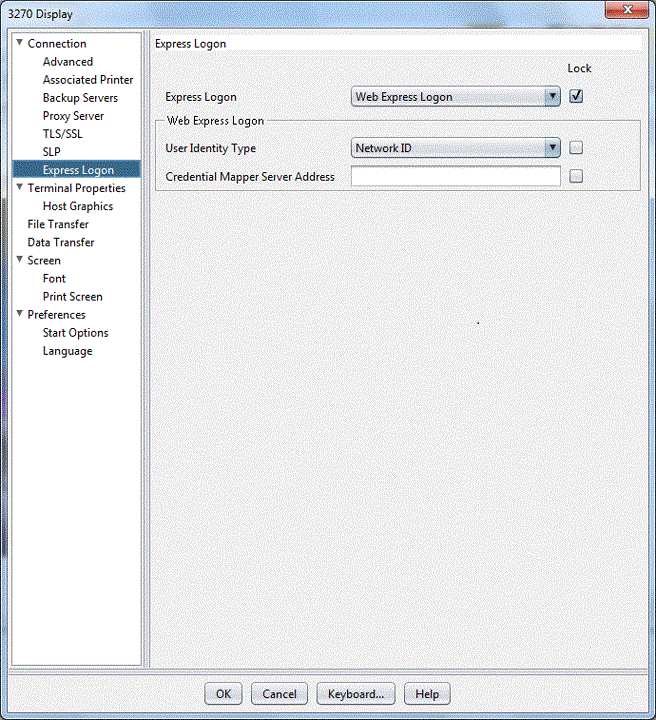
- Select the User Identity Type:
- Local System ID: the user's local operating system ID. Web Express Logon currently supports Microsoft Active Directory (Windows Domain).
- Network ID: the user's network security application ID. Web Express Logon currently supports IBM Tivoli Access Manager and Netegrity Siteminder.
- Portal ID: the user's Portal Server ID. Web Express Logon currently supports Portal Server, a component of IBM WebSphere Portal.
- Type the full URL of the credential mapper server, for example,
https://server_name/junction/cm/CredMapper, where
- server_name is the name of the authentication server
- junction is the name of the junction (optional)
- cm is the credential mapper servlet space
- CredMapper is the servlet name
The servlet that resides at this URL processes the HTTPS request from the user, performs a lookup, and returns the user's credentials. The Z and I Emulator for Web client uses the obtained credentials to automate the login process.<servlet> <servlet-name>CredMapper</servlet-name> <display-name>CredMapper</display-name> <servlet-class>com.ibm.eNetwork.security.sso.cms.CredMapper</servlet-class> - Click OK.